FREE U.S. SHIPPING ON ORDERS $65+

Author
Author Image
Date
Category
Tags
Featured Item
How to Grow Monstera
Immunity, Lifestyle, Longevity

Author
Denine Walters
August 1, 2024
Denine Walters
I don’t like to play favorites with my plants (I’m worried that they’ll hear me!), but I must admit—my Monstera deliciosa is one of the ones that gets the most compliments. There’s just something about its large, tropical leaves with their dramatic holes that makes it such an impressive houseplant. And luckily, Monsteras are a fairly easy plant to grow, even for beginners. If you’re wondering how to grow Monstera, check out my guide below!
Bottom Line Up Front
Bottom Line Up Front
When grown as houseplants, Monsteras are pretty easy-going. Just give them bright, indirect light, water them about once a week, and give them something to climb, and they’ll be happy. I’ll go into more detail below, but these are an excellent choice for even beginner plant parents.
Choosing Your Monstera
Choosing Your Monstera
If you’re purchasing a Monstera from a nursery or garden center, choose one with dark, glossy leaves. Avoid plants with pale leaves or those with black or brown spots. Make sure you check the leaves for signs of pests and disease as well—you don’t want to bring something home that might infect your other plants. Look for a sturdy plant with a strong stem, and avoid plants with too many roots spilling out of the pot, as it can be a sign that the plant is rootbound.
If you’re purchasing a Monstera cutting, make sure that the cut is clean and fresh, not dried out. The cutting must have at least one node, as these are where new growth will develop (nodes look like joints along the stem and are often, but not always, brown or tan in color.) If your cutting has aerial roots and healthy leaves, that’s even better, and if it’s already rooted, the roots should be strong and white or light brown, not dark brown or black.
Different Types of Monstera
.png)
Monstera Deliciosa. Photo by Laura Vigdor

Monstera adansonii. Photo by Laura Vigdor
Now that you know how to spot a healthy plant, here are a few of my favorite Monstera varieties to keep an eye out for next time you go plant shopping.
- Monstera deliciosa: This is one of the types of Monstera most commonly seen grown as a houseplant and my personal favorite. It has large leaves with distinctive holes and slits in them, and the plant itself can grow up to your ceiling indoors (and more than 50 feet in its natural habitat!). As the name suggests, Monstera deliciosa produces a very tasty fruit. The green, cone-like fruit has a tropical flavor that tastes like a combination of banana, pineapple, and mango. It’s unlikely that your Monstera houseplant will mature enough to bear fruit (it needs to grow very big in a warm, bright environment for that—preferably outdoors year-round, and it needs to be pollinated), but you can sometimes find the fruit in stores. The specialty food shop down the street from one of my old apartments used to carry it from time to time.
- Monstera adansonii: This is probably my second favorite Monstera. I currently have a baby one that was propagated for me by a friend! The leaves are significantly smaller and have more holes than a Monstera deliciosa. This one looks fabulous climbing up a wall on a wall trellis!
- Monstera dubia: This Monstera is sometimes called a “Shingle Plant” because its leaves lay flat like shingles as it climbs. Its leaves have striking color variations, and it looks particularly stunning when climbing a flat, straight trellis like The Ecologist.
- Monstera obliqua: This rare variety is sometimes confused with the Monstera adansonii, but it has even larger, more dramatic fenestrations (the holes in its leaves). I love how lacy and delicate they look!
You’ll also find different cultivars of many of these Monstera species, which are bred for specific traits like variegated leaves. Some of the most popular (and pricey) ones include the Thai Constellation and Albo Variegata cultivars of Monstera deliciosa, both of which have stunning dark green and creamy white patterned leaves.
The Ideal Growing Conditions for a Monstera
The Ideal Growing Conditions for a Monstera
Monsteras are surprisingly easy-going houseplants, but there are some conditions that they prefer.
- Monsteras prefer bright, indirect light. Placing it in a South-facing window is best, though too much light may burn the plant’s leaves.
- They like high humidity and warm temperatures, which closely replicate their natural habitats in Central and South America.
- They prefer nutrient-dense, well-draining, peat-based soil.
- Water your Monstera slowly and deeply whenever the top few inches of soil dry out. For mine, this is about once a week in the spring/summer and once every two weeks in the winter.
- If you choose to fertilize your Monstera, use a balanced 20-20-20 or 10-10-10 blend or an organic fish emulsion or seaweed extract fertilizer, and feed it every four to six weeks in the spring and summer only. I like to dilute my fertilizers to 50% strength (read the package directions!) and only fertilize after watering to prevent root burn.
How to Grow Monstera
How to Grow Monstera
If you’ve just picked up a Monstera from a nursery, plant shop, or a friend, here’s everything you need to know to help it thrive!
Potting Your Monstera
Monsteras are fast growers, so you may need to repot your plant every few years to give it enough space. Whether you just picked up your plant from a nursery or you’ve had it for years, you’ll know it’s time to repot it when it starts to look overcrowded in its current pot, or you see roots starting to poke through the drainage holes in the bottom of the pot. Follow the steps below when potting (or repotting) your Monstera.
- Choose a pot with good drainage that’s at least ⅓ as wide as your plant. So, if your Monstera measures two feet across, you’ll want a pot that’s at least eight inches in diameter.
- Fill the pot about ⅓ of the way with rich, well-draining soil. I don’t recommend adding a layer of rocks to the bottom of the pot. Your pot needs drainage holes, and adding rocks isn’t going to miraculously add drainage to a pot without them (you’ll just have a layer of submerged rocks in your pot). If your pot already has adequate drainage (which it should!), you’ll just be creating rocky soil for your plant, which doesn’t do a whole lot other than make repotting your plant in the future much more frustrating.
- If you’re using a new trellis or moss pole for your Monstera, now is a good time to get it situated in the pot, particularly if you have a large, heavy plant. The deeper you place the trellis in the pot, the more stable it will be, and you can always adjust it in the next few steps. If your Monstera is already climbing a trellis, move on to the next step.
- Gently tip your Monstera out of its current pot (I like to do this over a tarp or an old bed sheet). If your Monstera is in a plastic nursery pot, you can gently squeeze the pot to help release the plant but be careful not to pull it away too quickly, especially if your plant is rootbound. You can damage delicate roots and send the plant into shock. If your plant is already climbing a trellis, support it with one hand as you tip the plant out of the pot. You want to keep the plant attached to the trellis if possible.
- Inspect the roots for any signs of disease or pests. I’ll cover some common things to look for in more detail below. Unless your plant is rootbound, don’t loosen the roots too much. Pulling at them can cause damage, which will send your plant into shock. If the roots are tightly tangled, gently pull them apart without breaking them.
- Carefully place your Monstera in its new pot (be sure to support the base of the plant). Adjust it to make sure it’s sitting in the right position—you want it deep enough in the pot that you can cover it with about two inches of soil, then fill around the root ball with potting soil.
- If it’s not already climbing one, attach your Monstera to a trellis to give it extra support. I like the flexibility of a modular trellis like The Propagator, which can grow with your plant.
- Water your plant deeply, but avoid fertilizing it right away. You need to give its roots time to adjust to their new home. I recommend waiting at least two to three months to begin fertilizing again. If you use good potting soil when you plant your Monstera, it will get all of the nutrients it needs anyway.
- This step is optional, but I like to snap a photo of my freshly planted Monstera. That way, you can track its progress over time!

My Monstera about four years ago. Photo by Lauren Vigdor
My Monstera today, minus a few clippings I’ve shared with friends. Photo by Lauren Vigdor
Training and Pruning Your Monstera
The best way to get the largest, healthiest leaves on your Monstera is to give it something to climb like it would in its natural habitat. Trellising your plant will also help keep it tidy and take some weight off of its stems. If your Monstera is starting to sprawl out or flop over, you might want to consider training it up a trellis or a moss pole.
Training Smaller Monsteras

I’m giving my adansonii plenty of space to grow up its trellis. Photo by Lauren Vigdor
If your Monstera is small or is a flexible, vining variety like an adansonii, you can often just place a trellis near the base of the plant and let it do its thing. In time, your plant will climb the trellis naturally. Vining plants can be gently coaxed through the holes of a trellis. I recently potted a water-rooted adansonii and threaded it onto my modular Weaver trellis. I’ll add on to this trellis as the plant grows to keep training it upwards.
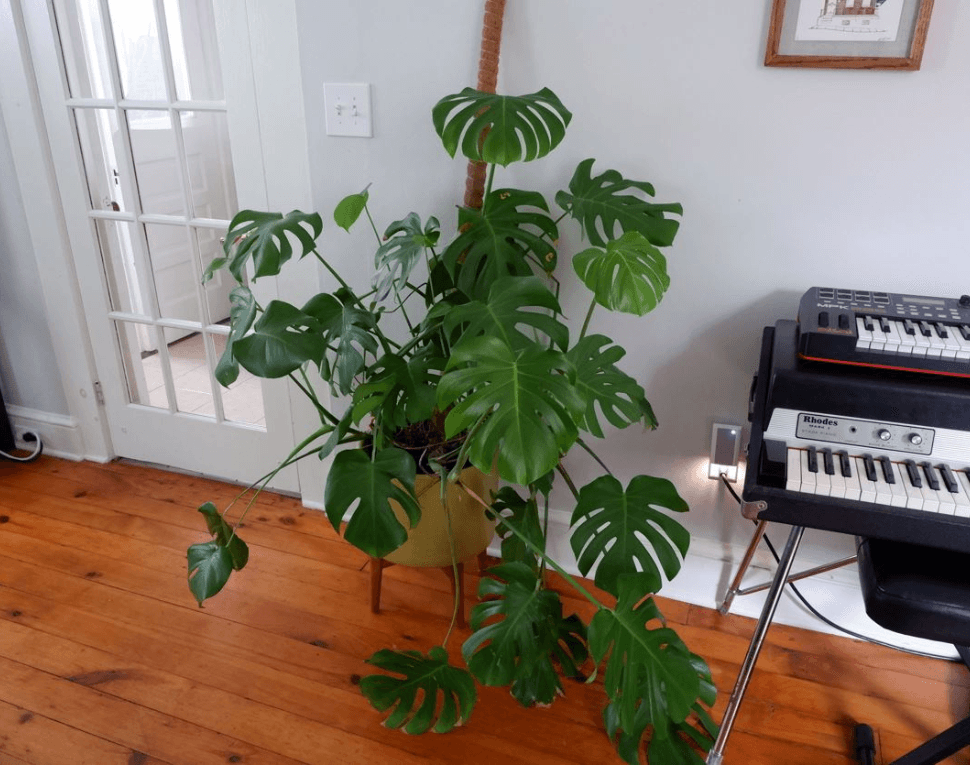
Training Monstera Deliciosa

My deliciosa “hugging” its coconut coir pole. Photo by Lauren Vigdor
If you have a large, overgrown Monstera, like my Monstera deliciosa, you’ll need a few more supplies. In addition to your trellis, you’ll need twine, velcro, or soft, flexible plant ties to attach your Monstera. Position the trellis at the base of the Monstera’s stem. Note that if your Monstera is very large or unruly, it might be easier to do this while you repot your plant so that you can position everything where you want it and drive the trellis deeper into the soil for added stability without worrying about damaging any roots.
Once your trellis is in place, gently tie your Monstera’s stem to it so that it “hugs” the trellis. You can wind any aerial roots around the trellis to encourage your plant to climb on its own.
Pruning Monstera
If your plant is sprawling and spilling out in all directions, you may want to consider pruning it. Pruning will keep your Monstera tidy and allow for better airflow around your plant. It’s also a great excuse to propagate your clippings and create even more Monsteras (more on that below!) There’s even a chance that you have multiple plants already growing in your pot, which is great if you want a very full-looking plant, but it can lead to overcrowding or a messy, unruly look.
The spring and summer are generally the best times to prune your plant, as it gives them time to bounce back before their growth slows down in the colder months. If you decide to prune your Monstera, make sure that you use sharp, clean shears and don’t remove more than ⅓ of the plant.
First, remove any dead leaves (these are a natural part of your plant’s life cycle and can usually be removed quite easily). Next, you’ll shape your plant. If you don’t want your plant to grow taller than it currently is, remove any leaves from the top, cutting right above a leaf node. This will allow new leaves to form so that you’re not left with bare stems sticking out of your plant!
If there are leaves and vines sticking out at awkward angles that you want to cut back, follow a similar practice and remove them above a node. If you want to prune clippings to propagate them, you’re going to want to make your cuts between nodes—I’ll get into that more in a minute!
Propagating Monstera
Propagating Monstera
If you want to propagate your Monstera to share, sell, or fill your home with plants (no judgment here), there are a few different methods you can use, but my favorite way is through stem cuttings. It’s clean, simple, and relatively foolproof.
Step 1: Technically, you can root any cutting as long as it has a node, but if your cutting has a leaf or two to help it photosynthesize, it will grow much faster. Look for a stem with one or two leaves (bonus points if it’s also got an aerial root to help it absorb nutrients) and make a clean cut below the node. I like to find places where I can cut in between two nodes. That way, my cutting has a place to form new roots and leaves, and my mother plant will form new leaves out of the lower node, so I’m not leaving behind a bare stem.
Step 2: This is optional, but you can dip the cut end of your cutting in rooting hormone to help it grow faster. I usually buy powdered rooting hormone online.
Step 3: Place your cutting in a container of water, soil, Pon, or perlite. Make sure that the node is fully submerged/planted. You can direct any aerial roots into the water/soil to help absorb nutrients. I like to use water because I like to be able to see the roots developing, but you can use whatever you prefer. Just make sure to change the water frequently if you use it so that it doesn’t become cloudy.
Step 4: Place the cutting in bright, indirect light and water it often (if using Pon/soil), but don’t drown it. Once roots develop (this can take several weeks), you can transplant your cutting!
Common Monstera Problems and Solutions
Common Monstera Problems and Solutions
Here’s how to identify a few common setbacks you may encounter with your Monstera and how to deal with them.
- Yellow Leaves: Yellow leaves are a pretty common problem with houseplants in general, and they’re usually a sign that you’re overwatering your plants. Make sure that your pot is draining correctly, and only water your Monstera when the top inch or so of soil dries out. If watering doesn’t appear to be causing your yellow leaves, make sure that the plant is getting enough sunlight.
- Brown, Crunchy Edges on Leaves: If your Monstera leaves are starting to turn brown and dried out around the edges, it’s probably a sign of one of two things. Either your plant is too dry and isn’t receiving enough water or humidity, or your plant is receiving too much direct sunlight, and the leaves are starting to burn.
- Curling or Drooping Leaves: Curling or drooping leaves are usually a sign that your Monstera needs water. Sometimes houseplants like to be dramatic, and they’ll let you know when they’re thirsty! Droopy leaves can also be a sign that your plant is overcrowded and needs to be repotted.
- Webs on Leaves and Stems: If you see fine, dusty-looking webs on your plant, you’re about to go head-to-head with my arch nemesis: spider mites. In all seriousness, though, don’t panic. These annoying little pests love our plants as much as we do, but they’re very manageable, especially if you catch them quickly and eradicate them thoroughly. My potted lemon tree has been afflicted with spider mites on more than one occasion, and I’ve found the most successful way to deal with them is to spray down the entire plant (either in the shower or outside with a hose) and spray insecticidal soap over the entire surface area of the plant. Follow the instructions on the bottle, and pay particular attention to the undersides of leaves where these guys like to hide.
- White Fluff on Leaves or Nodes: This could be several things, but is most likely either scale, mealybugs, or powdery mildew. Scale and mealybugs are pests from the same family. If you see small white, fuzzy or scaly barnacle-like lumps on the underside of your leaves, it’s one of them. They can be eradicated with a swipe of neem oil or a spritz of insecticidal soap. Powdery mildew is a fungal infection that looks like gray or white talcum powder on your plant. If you suspect your plant is infected with powdery mildew, make sure you isolate it from your other houseplants as quickly as possible, as the infection can spread. The best way to get rid of powdery mildew is to prune and discard the infected leaves, but if the infection has already spread and covers a significant portion of your plant, you can try spraying on a store-bought fungicide or a homemade mixture of baking soda, liquid soap, and water.
- No Holes in Leaves: One of the most desirable features of Monsteras is their fenestrated leaves. If your plant doesn’t have any leaf holes, there’s a chance that it’s just too young. Juvenile Monstera leaves are glossy and heart- or arrow-shaped (depending on the type of Monstera), and you might just need to give your plant some time to grow. If your plant is already two or three years old and still doesn’t have any holes or slits in the leaves, there are a few things you can do to encourage them. Make sure your plant is getting adequate light and water, and give it a trellis to climb.
.png)
Juvenile Monstera leaf. Photo by Laura Vigdor

Mature Monstera leaf. Photo by Laura Vigdor
FAQs
Should I care for my Monstera differently in the winter?
Should I care for my Monstera differently in the winter?
A Monstera’s growing season is typically in the spring and summer, which means it’ll slow down in the winter. You’ll most likely need to water your Monstera less frequently, and can fertilize very little or not at all in the winter. If your heating system dries out the air in your home, consider running a humidifier near your Monstera.
Can Monstera plants be grown outdoors?
Can Monstera plants be grown outdoors?
Monstera plants are native to Central and South America, where they grow outdoors. In the United States, Monstera plants can be grown outdoors in USDA Hardiness Zones 10 to 12 (just plant them somewhere with partial shade, or their leaves will burn). If you’re in a cooler climate, you can always move your plant outside during the warmer months and take it in before the frost.
How can I make my Monstera grow faster?
How can I make my Monstera grow faster?
To make your Monstera grow faster, make sure that it receives adequate light and water. Providing it with a trellis to climb can also encourage it to grow!
Growing a Thriving Monstera
Monsteras are among the most impressive-looking and easy-going houseplants you can grow, and now that you know how to grow them, there’s nothing stopping you! Just give your Monstera adequate water, bright, indirect light, and a cute trellis to climb (I like the modular ones), and it’ll be a happy camper!
Author
Denine Walters

Items can be exchanged for store credit within 30 days as long as the item is in its original condition. Send returns to:
Floratrel (Returns)
240 N. Prospect Street
Hagerstown, MD 21740
United States of America
Be sure to include your name, order number, and contact information in the package, and email us ahead of time should you need to exchange something at hello@floratrel.com. For any exchanges, the customer is responsible for return shipping.
Join Our Mailing List for New Products and Special Offers
Join Our Mailing List for New Products and Special Offers


Save money. Spoil your plants. 🪴
Save 10% on your first order.
Join our mailing list to stay in touch about new products and promos!
SAVE 10%
CODE: NEWCUST10
Valid for first-time customers only. Thanks for connecting. You can expect a follow-up email to confirm your subscription.